
 diglloydTools™


How-To: Formatting a new Hard Drive or SSD in Apple Disk Utility
re: Installing an 18TB Hard Drive into the OWC Mercury Elite Pro
re: Formatting a new Hard Drive or SSD in Apple Disk Utility
re: TESTED: Western Digital 18TB Ultrastar DC HC550 hard drive in OWC Mercury Elite Pro USB 3.2 enclosure
When buying a new hard drive or SSD, it needs to formatted before it can be used. This step-by-step walk-through shows how easy it is to get started.
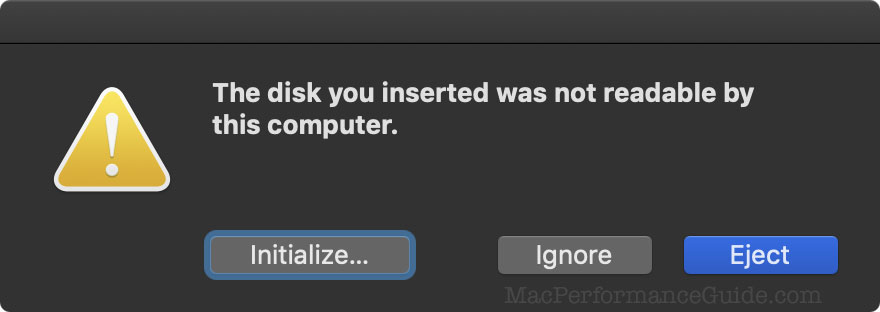
1. Warning dialog for new drives
When the Mac first sees the new drive, it might be in an unformattted, uninitialized state. So expect to see this dialog pop up. Click to bring up Disk Utility.
If you do not see this, then the drive is either not seen by the system (diagnose/fix), or it is already formatted. IMPORTANT: if the drive is already formatted, it might be formatted for a Windows PC (e.g. FAT32)—erase it as per Step 2.
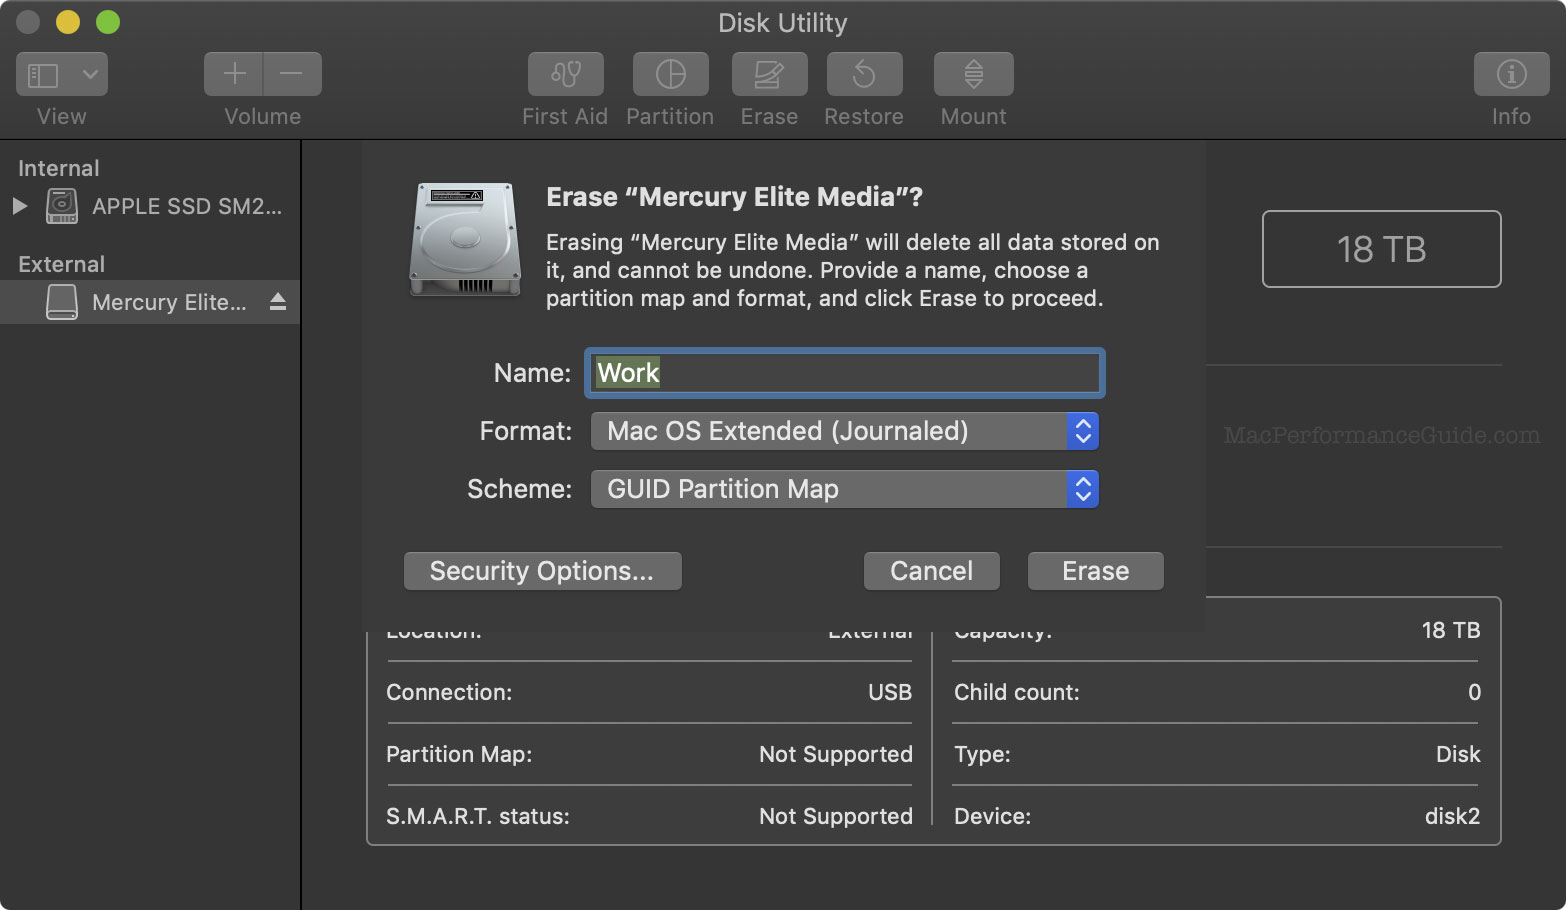
2. Erase the drive in Disk Utility
[See note] Select the new drive, and click . When prompted, enter a name for the volume (“Work” as shown here), and choose the format and scheme, as shown below.
Use for hard drives, and for SSD. Always use for macOS.
It is best to first choose so that both drives and volumes appear in the list at left (if not showing, choose ). This is important (in part) to make sure you are working with the new drive, which should not have any volume listed under it (“Mercury Elite…” as shown here).
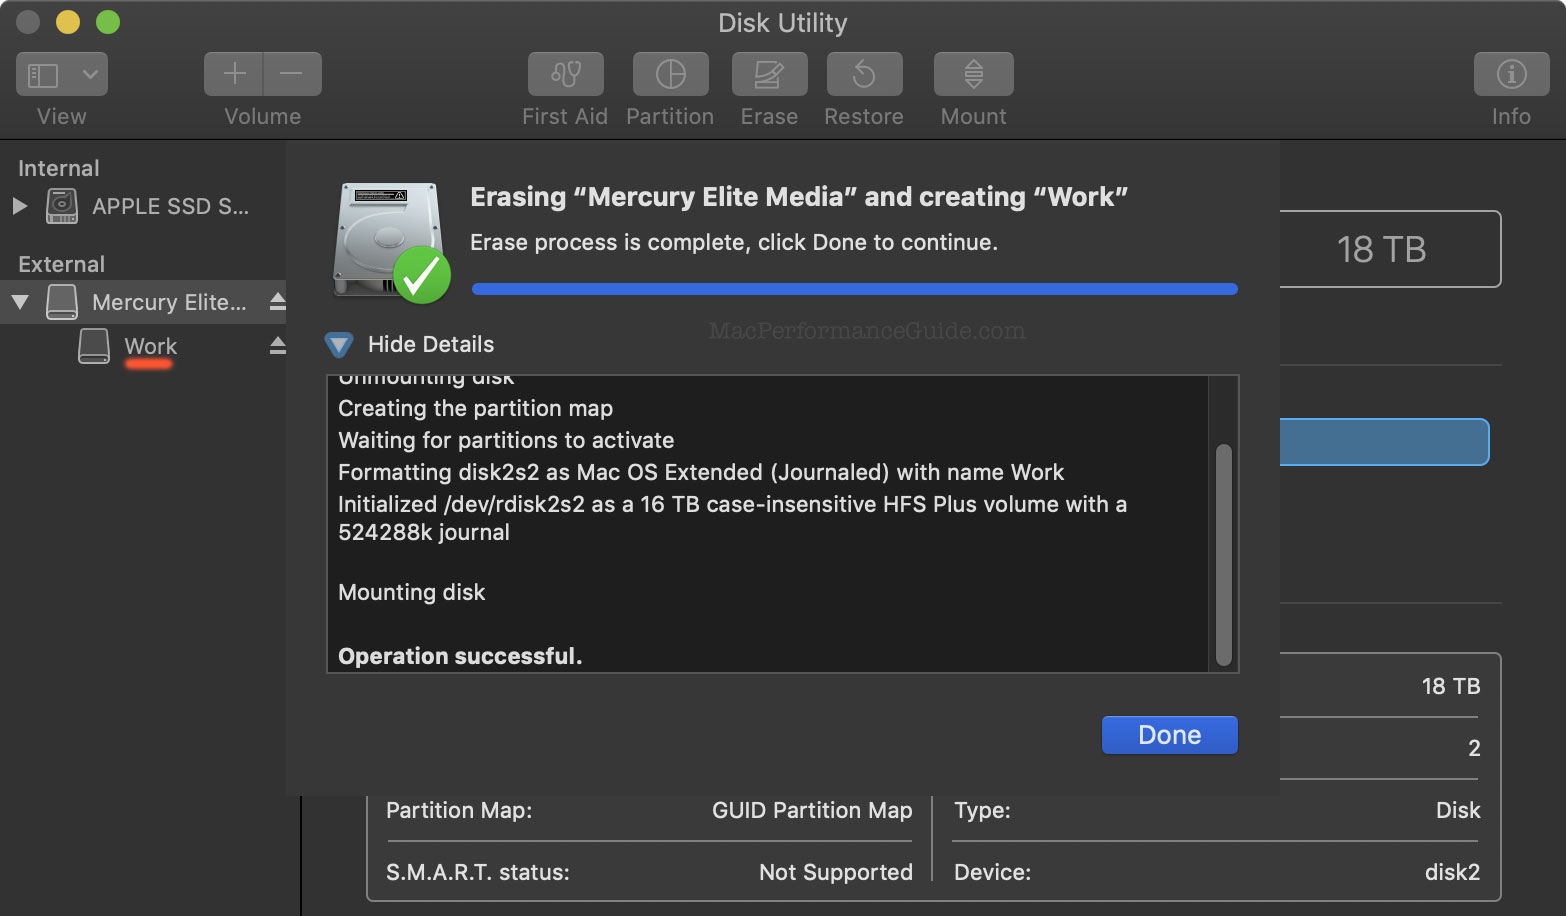
3. Observe the successful result
When Disk Utility finishes (up to a minute), confirmation will be given. Here, the new volume is now shown listed under the drive ().
An error should not occur, but Disk Utility has quite a few bugs. Occassionally it might be necessary to try again.
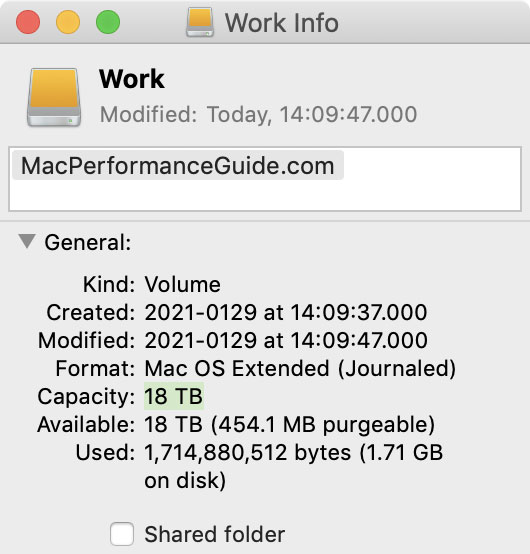
As a final verification, select the new volume in the Finder, and choose . In this case the drive is 18TB capacity, and that is confirmed as shown.
4. If the new volume is a backup, treat it as such
If this new volume is to be a backup, two things are advisable:
- You don’t want the system making backups of backups. Exclude all backup drives from Time Machine.
- Usually it is unwise to have backups indexed by Spotlight—this can result in opening the wrong files, working on them thinking they are originals, then having them wiped out at the next backup (yes this has happened to me!). So exclude all backup drives from Spotlight search (those that are not Time Machine backups themselves).
