|

|

|

|

|
$220 SAVE $130 = 37.0% Western Digital 16.0TB Western Digital Ultrastar DC HC550 3.5-in… in Storage: Hard Drives
|
|

|
|

|
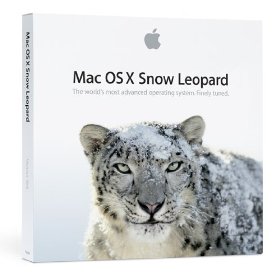
How to Safely Install Snow Leopard
On the day of its release, I installed Snow Leopard on a MacMini, a MacBook Pro 2.93GHz, and a quad-core Mac Pro Nehalem 2.66GHz. Installation went smoothly with all 3 machines. These were all non-critical machines, so if something went awry, it was of no particular concern. Also, none of these Macs have special hardware.
However, my workhorse machine has to be working at all times. It has dual eSATA cards, dual video cards and monitors, and a wide variety of software, so it’s the one most likely to encounter issues. Therefore, it’s going to be the very last machine to be upgraded.
Most installs of Snow Leopard will work without a hitch. The more “vanilla” your Mac, the better the odds, but remember, there’s no guarantee of a problem-free upgrade.
Need help?
Consulting is available if you have additional concerns.
Easy to install, and with a safety net!
Use caution installing Snow Leopard on Macs that are critical to your work. You can install Snow Leopard with minimal risk, and with a back-out strategy, and it’s fast and easy. This page will tell you how.
Here, one MPG reader summarizes his concerns, though they aren’t quite what I recommend; to clarify: keep your operating system and applications on one drive (the boot drive), but separate all important data onto another volume. System and applications naturally go together; your data naturally should be elsewhere.
I am intrigued with your suggestion to keep OS and data/apps on different disks - makes sense. However, with dozens and dozens of apps, I fear losing all my prefs and especially registrations if I install the new Snow Leopard onto a virgin partition and launch apps from my current apps location on a different disk. I'm not inclined to re-install them all, and certain apps also use hidden files. I doubt just copying my current prefs file into 10.6 's analogous location is a good idea, either. Is it fair to say your idea for Mac hygiene is a good one, but one must be prepared to do some very heavy lifting to make it happen? I don't suppose a symbolic link to my old Apps folder or prefs folder, etc. is workable, is it? — Daniel F
Step 0 — backup
Make two backups before upgrading! You should be doing this anyway, but if you’ve been lax in backing up, a major system upgrade is a good reminder. See Simple but Cost-Effective Backups.
Step 1 — clone your boot volume
You will need another hard drive, or a spare partition on an existing drive. Any external Firewire drive will do the job here. If you don’t have one, invest in the bargain Voyager Q drive dock with any SATA drive, such as the inexpensive 1TB Hitachi 7K1000.B.
Your safety net is the clone you’ll make of your boot volume. If things go awry, you can clone the clone back to your boot volume. Or you can boot from the clone.
Two steps
The clone of your boot volume acts as a backup and an alternative boot drive.
- Clone your existing boot volume to a spare volume;
- Install Snow Leopard onto the existing boot volume;
As shown below, to avoid confusion during install, I renamed my boot volume to SnowLeopard; this is the one I’m upgrading. The clone I’ve renamed to Leopard. Use any names you like, just so you’re clear on which is which. Either one is bootable (since one is a clone of the other).
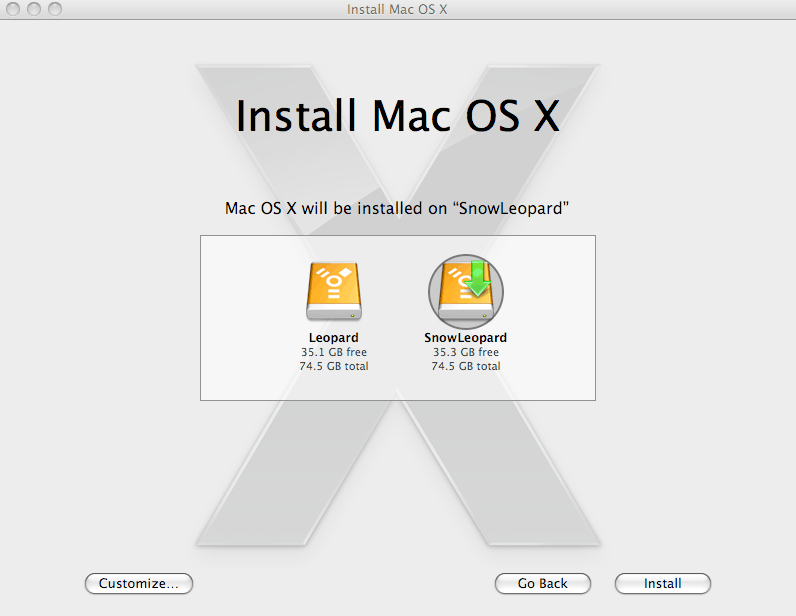
Step 2 — Install Snow Leopard
Be clear on which volume you are upgrading (see above).
Click the button, then uncheck any items you don’t need. The only items to consider installing for most users are and (PowerPC support) and .
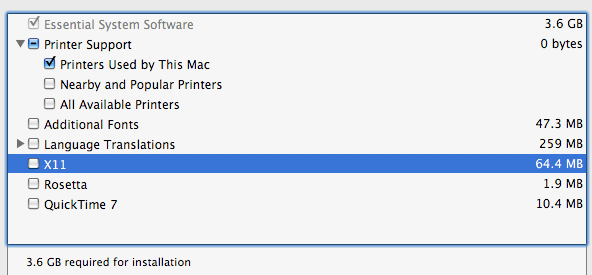
Installation time
Time to install is given as an estimate, and varies depending on disk speed and other factors. The 45 minute estimate for my Mac Pro ended up taking only 20 minutes.

I’m done already?
Yes. By making the clone, you’ve protected yourself if you want to revert to your original system: just clone the clone back over the original boot drive and you’re back where you started!
However, you can also boot off your old system (the clone), or the new one.
Choosing your startup disk

System Preferences => Startup Disk
The Snow Leopard install will automatically set the startup volume to the new system.
You can reboot onto any available system by going to . After rebooting, you’ll be running whichever system you’ve chosen; you can freely reboot with either.
Your safety net exists because your original system is there, ready to revert to. And if things really go “south”, you can clone the original system back over the upgraded one, reverting to where you started.
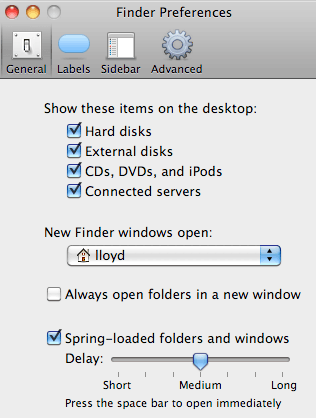
Setting Finder preferences in Snow Leopard PERMALINK
See Setting Finder Preferences in Snow Leopard.
Ultra-high performance across entire capacity, outperforms the competition.
Tiny, bus-powered, rugged, compact!
Seagate 22TB IronWolf Pro 7200 rpm SATA III 3.5" Internal NAS HDD (CMR)
SAVE $100

 diglloydTools™

