 diglloydTools™


|

|

|

|

|
Physical Drive Installation
The unit tested at MacPerformanceGuide.com arrived with drives already installed.
Although the ioSafe N2 is effectively a RAID-1 mirror with dual identical drives installed, it is possible to install mismatched sizes (e.g. one 1TB and one 2TB drive) and the unit will apply a smart approach to using the available space.
Upgrading drive size
The MPG recommendation is to replace both drives as a pair, e.g., swapping 2 X 1TB for 2 X 2TB or 2 X 4TB. However, that presumes a backup and restore.
The ioSafe N2 is smart enough that if upgrading is done one drive at a time, then the data is preserved.
- First swap out one drive for a higher capacity drive.
- Wait the requisite amount of time for the ioSafe N2 to mirror the data to the new drive (some hours perhaps even half a day).
- Swap out the other drive for another higher capacity drive; the ioSafe N2 will mirror the data to the 2nd larger drive.
Installing drives
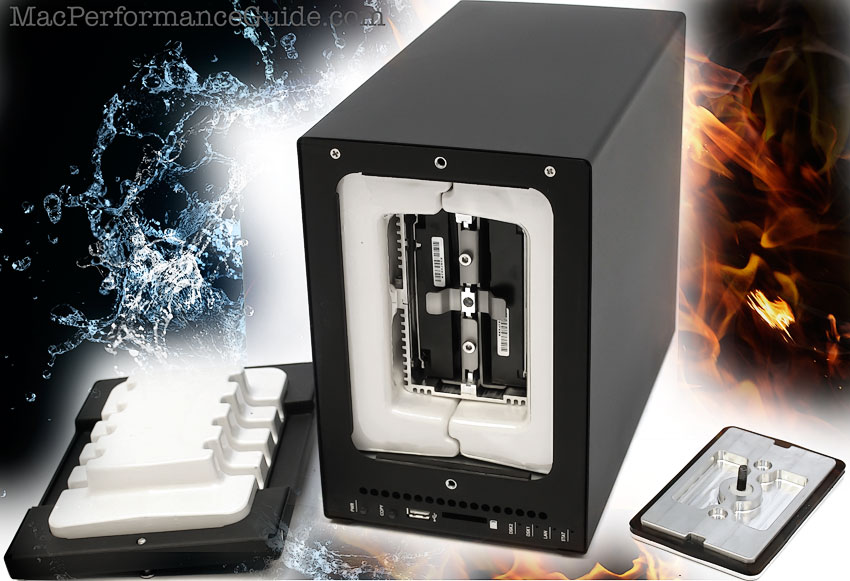
To install drives, find a clean and dry and fire-free location.
The supplied special allen wrench is used to remove the outer cover (shown at left) and an inner plate (lower right). The drives can then be added or swapped.