
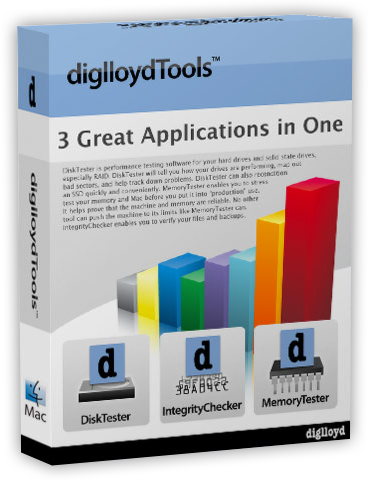
 diglloydTools™

$220 SAVE $130 = 37.0% Western Digital 16.0TB Western Digital Ultrastar DC HC550 3.5-in… in Storage: Hard Drives
|

|

|

|

|

|

|

|

|

|
Buyer's Guide: Setting up a Mac Pro
Related: backup, hard drive, How-To, Lightroom, Mac Pro, Photoshop, RAID, SSD
This page assumes you’ve bought a Mac Pro and the suggested parts described in steps 1 and 2 of the Buyer’s Guide page. If not, adapt these instructions accordingly. For more information, see Setting up Your Mac.
If you need assistance, contact us for a consultation. This page necessarily simplifies some of the steps, but references to details are found in each step.
Step 1 — Install the memory and SSD
When installing hardware, your Mac Pro should be shut down, and the power plug removed. Use anti-static precautions.
- Install all the memory. This is as elegant and easy as it gets on the Mac Pro.
- If you purchased an SSD for your boot drive, install it into the lower optical bay.
- While you have the machine open, go ahead and remove all four interior hard drive bay sleds, including the hard drive that came with the computer.
Do not yet install your extra hard drives.
Step 2 — System install
You have nothing to lose at this point, so get comfortable with installing the system (it’s easy) so that if you ever need to do it, you’ll be at ease with the process.
This summary assumes you are using the recommended SSD and will use all four (4) drives in the internal bays for storing data:
- Boot off the system install DVD (insert it and double click the icon).
- Choose then the newly-installed SSD, calling it Boot.
- Start the system install* to the SSD. When done, it reboots off the new boot drive.
- Install any Apple applications you want from the 2nd install disk.
- Run Software Update ().
* When installing the system software, choose and to minimize bloatware. In particular, uncheck all extra fonts and all printer drivers; you do not need these installed by default.
After the system has finished installing and then rebooted, eject the system install DVD and store it. You won’t need it any more unless for some reasons you want to install a fresh system.
Step 3 — Physical hard drive install
Screw four matched hard drives from OWC into the Mac Pro internal drive sleds. A small philips screwdriver is needed. Take anti-static precautions.
Power down the computer and insert all the sleds in the internal drive bays; the order does not matter now or later.
Step 4 — RAID setup
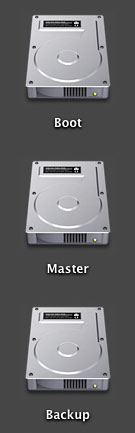
5 drives, 3 volumes
Start up your Mac.
The hard drives you installed will not yet appear on the desktop because they are not yet initialized. Even so, be sure to set Finder preferences, which are brain-dead by default: initialized drives aren’t shown on the Finder desktop, an idiotic presumption for any Mac with more than one volume.
For most users, a 2+2 scenario is ideal: two drives are used for a RAID 0 stripe for high performance and high capacity. The other two drives are used for Time Machine backup.
See Setting up RAID for full instructions:
- create a 2-drive RAID 0 stripe with 2 drives called Master
- create a 2-drive RAID 0 stripe with 2 drives called Backup.
When done, you’ll have three volumes show up on the desktop: Boot, Master and Backup. If you’ve used 2TB drives, then Master and Backup will both be 4TB capacity. Boot is your system and applications (boot) drive, the solid state drive (SSD), assuming you opted for one.
You can vary this strategy: a 3-drive stripe and single-drive backup, a mirrored backup volume, a mirrored boot partition, etc. Such things are best understood via consulting. Volume capacity doesn’t matter so long as the data to be backed-up fits onto the backup drive; the idea here is for high speed for your files on Master.
Heavy duty Photoshop users working with enormous files (1GB on up) might want a three or even four drive stripe for a scratch volume. The same ideas apply, but if you want help, contact us.
Optional: a DiskTester fill-volume test of both Master and Backup is a good idea (run simultaneously in two Terminal windows). Erase Master and Backup when done, using Disk Utility (they'll be full).
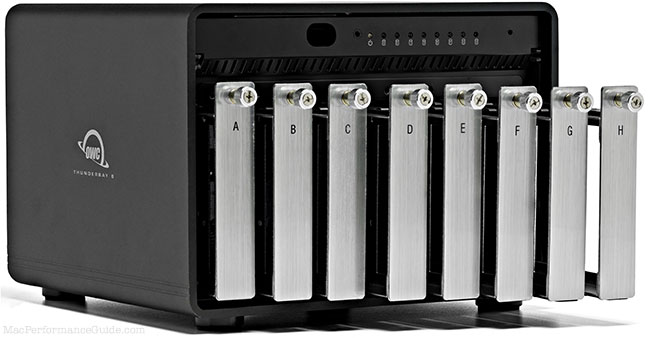
Eight-bay Thunderbolt 3 high-performance storage for photo and video.
Hard drives or SSDs.
Non-RAID or RAID-0/1/4/5/10.
Capacities up to 144 Terabytes!
Step 5 — Install applications
Install your favorite applications: Photoshop, Lightroom, etc. At this point, play a little and see that everything is fine.
Get Mail set up, make sure the internet is working, etc., but avoid installing anyadd-ons that are likely to disrupt your system. Stick to the required software at this point only until you are feeling cozy with your new system,.
Step 6 — Data transfer
Transfer all your regular data to Master on the Mac Pro. I strongly recommend not using wireless. Apple’s Migration Assistant can help, but it’s failed me so many times now that I have lost faith in it. So if possible, use an external hard drive to transfer data from your old PC or Mac to the new one.
All data (images, music, spreadsheets, documents, etc) should go onto Master. Everything that matters to you! Do not store your data on Boot; it is your dedicated system and applications drive.
Photographers: your images, Lightroom or Aperture catalogs, music, etc all go onto Master. Set the Photoshop scratch volume to Master or Backup, since both are striped RAID, they are fast enough except for extremely large images (1TB on up).
Note that programs that keep catalogs such as Adobe Lightroom might or might not automatically recognize where original images reside (once moved to Master), you'll need to use
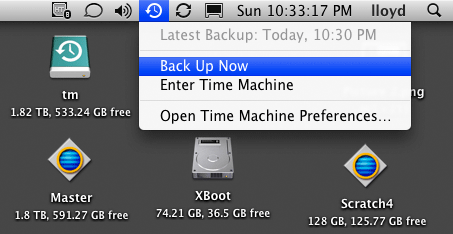
Step 7 — Configure Time Machine backup
Establish a Time Machine backup volume. In this case, you’ll designate the volume Backup as the time machine drive.
Open the Time Machine preferences, and make sure Backup is the backup drive, then click .
In , make sure that nothing is excluded that you want backed up. There should be nothing in this list, normally.
Time Machine backups up every hour, but you can request a backup whenever you want:
Step 8 — Establish your backup strategy.
Once a week? Every time you add new images/movies/music? Choose a strategy and stick with it.
Backup everything on Master and also the Users folder on your boot drive to external drives. This is in addition to the Time Machine backup to Backup: if your Mac is stolen or vaporized, external backups stored elsewhere are what save your digital life.
The whole idea of lowering your risk is to keep it simple: make sure you store your stuff only on Master whenever feasible. More on backup.
You might want to use the original internal drive that came with the Mac Pro as a clone of your system using a drive dock like the NewerTech Voyager Q.
Step 9 — Sanity check the system
Launch your applications. The experience should be very pleasant compared to any previous Mac.
To rule out any latent hardware issues, consider the following:
- Run an overnight system stress test using MemoryTester (optional, but does wonders for your confidence).
- Using DiskTester, verify that sustained read/write performance is 200MB/sec or faster for both Master and Backup (the two drive RAID 0 striped volumes).
Seagate 22TB IronWolf Pro 7200 rpm SATA III 3.5" Internal NAS HDD (CMR)
SAVE $100
