
 diglloydTools™

|

|

|

|

|

$220 SAVE $130 = 37.0% Western Digital 16.0TB Western Digital Ultrastar DC HC550 3.5-in… in Storage: Hard Drives
|

|

|

|

|
Installing a solid state drive (SSD)
Related: hard drive, iMac, laptop, Mac Pro, MacBook, raw file processing, SSD, storage
June 15, 2009
As described in How to Make Your Mac Feel Lighting Fast, I’m never going back to a hard drive for my system/applications drive.
But how do you switch to a solid state drive (SSD) if your system is presently on a hard drive? It’s easy really— clone your existing system (boot) drive to the new SSD drive, then replace the existing boot drive with the now-identical SSD. Reboot and you’re done.
SSD drives are relatively expensive. For a boot drive, an 80GB drive is more than adquate for a Mac Pro; you’ll want to separate your data from the boot drive anyway. My 80GB boot drive contains only ~38GB of files and I have numerous applications installed. For Macs with only a single internal drive (everything else), a higher capacity SSD is advised. View prices on SSD
Cloning and startup disk PERMALINK
These instructions assume you are switching your boot (system) drive to an SSD; otherwise install an SSD just like any hard drive and use it as you see fit.
Clone your boot drive with Carbon Copy Cloner onto the new SSD drive (the original becomes a backup once you start booting off the SSD). Even if you’re not installing a new drive, a regular/periodic clone of your system drive is a smart move in case your system drive ever fails or starts to misbehave.
To make the clone, the new drive (SSD) needs to be connected. For the Mac Pro, install the drive as detailed below.
For other Macs with only a single internal drive, the Voyager Q drive dock is a convenient option: insert the new SSD drive into the Voyager Q to make the clone, then replace the existing system drive with the SSD.
Initializing the SSD
After rebooting the system will recognize the newly installed SSD. Format the drive (“Erase”) How, then clone to the new drive as described below.
To avoid confusion, I like to name my boot drive , or for the SSD, , or as shown below, .
Cloning your boot drive
Select your existing boot drive (“Source Disk”) and select the new drive (“Target Disk”), then click .
The cloning process will of course take time in proportion to how much data is present, so clear out any files you don’t need, empty the trash, clear browser caches, etc before starting the clone.
Setting the startup disk
When the clone has finished, use Disk to set the SSD as the startup drive. then reboot the Mac, and you’re golden.
Once you have rebooted off the SSD, store the original boot drive safely somewhere for a short while. You can later recycle that drive for backup duty or other purposes.
Installing in Mac Pro PERMALINK
Mac Pro installation varies depending on model.
In all Mac Pros, you can install the 2.5" SSD drive into a 3.5" converter case like the Icy Dock, so that it can be installed in any of the four standard drive bays.
However, I prefer to use the 4 standard internal bays for large fast hard drives, and to install the SSD in the lower optical bay. If you have two optical drives, the lower bay is occupied. In that case, you can either remove the lower optical drive and put it into an external case, or use one of the 4 standard bays.
Mac Pro Nehalem (2009) installation
This is a breeze; the Mac Pro Nehalem (see review), is pre-wired with the SATA and power cable. It’s a 2-minute operation to install the drive. There is no specific how-to video for this, no tools needed, but the other OWC videos may be helpful in familiarizing yourself with the machine innards.
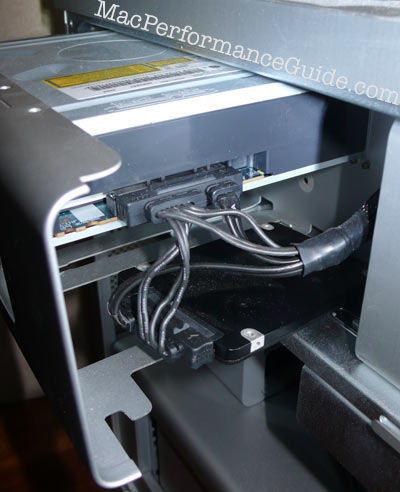
- Unplug the power cable, remove the Mac Pro cover, then pull out the two leftmost hard drive carriers (this allows the optical bay assembly to be pulled out).
- Pull the optical bay assembly mostly out (grasp it and pull). Plug in the SSD drive SATA connector and power connector. The SSD has no moving parts so it can just sit feely inside the optical bay (don’t do this with a conventional hard drive).
- Push the optical bay assembly back into place, taking care not to allow any cables to protrude through the gaps at bottom.
- Replace the two leftmost hard drive carriers, put the machine cover back on, plug in and reboot.
After rebooting, you’ll be asked to initialize the new drive How.
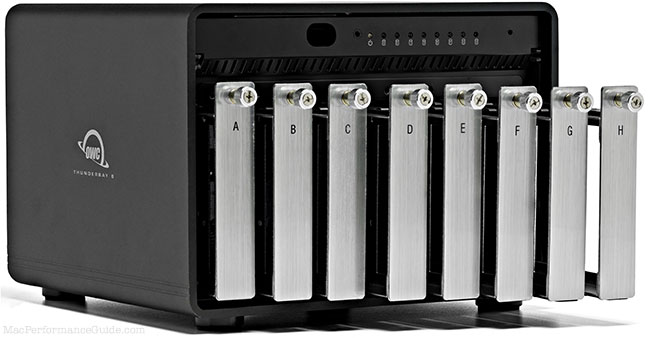
Eight-bay Thunderbolt 3 high-performance storage for photo and video.
Hard drives or SSDs.
Non-RAID or RAID-0/1/4/5/10.
Capacities up to 144 Terabytes!
Installation in older Mac Pros (2006 - 2008)
Tools — the NewerTech 11-piece Portable Toolkit is an excellent choice for most Mac hardware installation. I prefer to magnetize my screwdrivers with a small but powerful neodymium magnet, to avoid screws falling into awkward places.
The Mac Pro models prior to the March 2009 Nehalem are not pre-wired in the optical bay for SATA. You’ll need to route a SATA cable from the motherboard into the lower optical bay, and also use a power splitter/adapter cable for the right plug to provide power to the drive. Sorry, no pictures as an older Mac Pro was not available.
For you convenience, click here for a ready-to-order Cart containing all the tools and cables you’ll need. Then add your choice of SSD.
The fan assembly needs to be removed to allow access to the SATA ports on the motherboard (unless you have really small fingers). Depending on the model, you’ll need to remove one or two screws to allow the fan assembly to be pulled out. One is near the top at the motherboard, and the other requires removing the strongly-magnetized shield over the CPUs, at lower center (sorry no pictures).
You’ll be connecting an 18" SATA cable. For one drive, use the left-angle cable, for two drives use that and a straight cable. You’ll also need a power splitter cable, which plugs into the pre-wired power connector, and splits into two SATA power connectors (so two drives can be powered). I advise installing two cables so that if you ever want to install a second SSD drive it will be pre-wired for it.
- Remove the Mac Pro cover and pull out the two leftmost hard drive carriers (this allows the optical bay assembly to be pulled out).
- Remove the fan assembly after removing the two screws. This exposes two SATA ports on the motherboard.
- Pull the optical bay assembly all the way out. You’ll have to temporarily disconnect the power and data cables from the optical drive.
- Plug the power splitter cable into the empty power plug.
- Plug in the SATA cable(s) to the motherboard, and route them left and up, near the front of the machine and near the optical bay area. Remember, those two drive carriers are going back in, so don’t route the cables through that space (two objects cannnot occupy the same space at the same time!).
- Partially reinsert the optical bay assembly, routing the SATA cable(s) into the empty lower area.
- Reattach the data and power cables to the optical drive.
- Plug in the SSD drive (SATA connector and power connector). The SSD has no moving parts so it can just sit loosely inside the optical bay.
- Push the optical bay assembly back into place, taking care not to allow any cables to protrude through holes at bottom.
- Reinstall the fan assembly and the two screws.
- Reinsert the two leftmost hard drives.
- Put the machine cover back on, reboot.
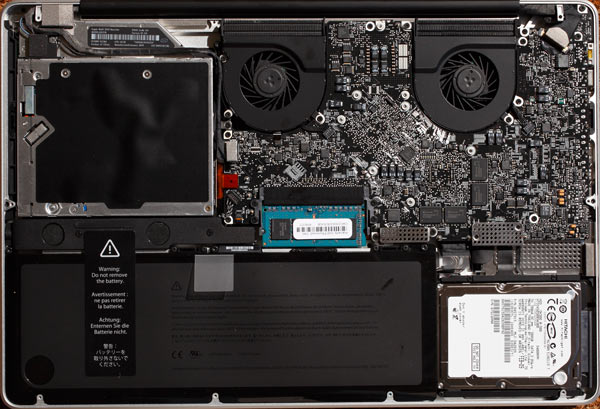
Installing in MacBook Pro or MacBook PERMALINK
All recent models of these machines allow easy access to the hard drive; see the manual or the excellent installation videos at OWC. All you need is the appropriate size screwdriver (see Tools above).
Installing in an iMac PERMALINK
The form-before-function iMac design makes swapping the hard disk quite difficult, with risk of dust behind the monitor glass. Professional installation is strongly recommended. Apple continues to arrogantly design the iMac to make it expensive and difficult to swap a hard drive.
Installing in a MacMini PERMALINK
This is weird, since SSDs are expensive enough in comparison to the price of a MacMini, but it will sure make the MacMini feel perky. See the MacMini review.
Seagate 22TB IronWolf Pro 7200 rpm SATA III 3.5" Internal NAS HDD (CMR)
SAVE $100
