
 diglloydTools™
Designed for the most demanding needs of photographers and videographers.

Connect and charge all of your devices through a single Thunderbolt or USB-C port.

$220 SAVE $130 = 37.0% Western Digital 16.0TB Western Digital Ultrastar DC HC550 3.5-in… in Storage: Hard Drives
|

|

|

|

|

|

|

|

|

|
Step-by-step to setting up RAID on Mac OS X
Please see the RAID-0 stripe and RAID-1 mirror how-to pages.
See also:
- How to Initialize or Erase a New or Existing Drive.
- How to Partition Drives Into Multiple Volumes.
- RAID-0 Striping and RAID-1 Mirroring
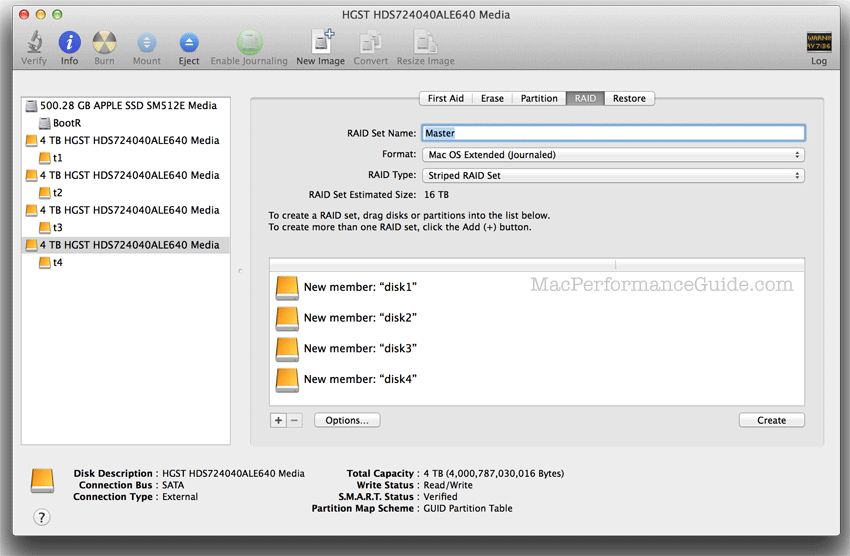
Creating a RAID-0 stripe with DiskUtility
View all handpicked deals...
Seagate 22TB IronWolf Pro 7200 rpm SATA III 3.5" Internal NAS HDD (CMR)
$440 $440
SAVE $click
Seagate 22TB IronWolf Pro 7200 rpm SATA III 3.5" Internal NAS HDD (CMR)
SAVE $click
