
 diglloydTools™

|

|

|

|

|

$220 SAVE $130 = 37.0% Western Digital 16.0TB Western Digital Ultrastar DC HC550 3.5-in… in Storage: Hard Drives
|

|

|

|

|
How to Partition Drives Into Multiple Volumes
Related: Apple macOS, backup, hard drive, How-To, optimization, RAID, SSD, storage
Please read and understand How to Initialize or Erase a New or Existing Drive for the basics of initializing drives.
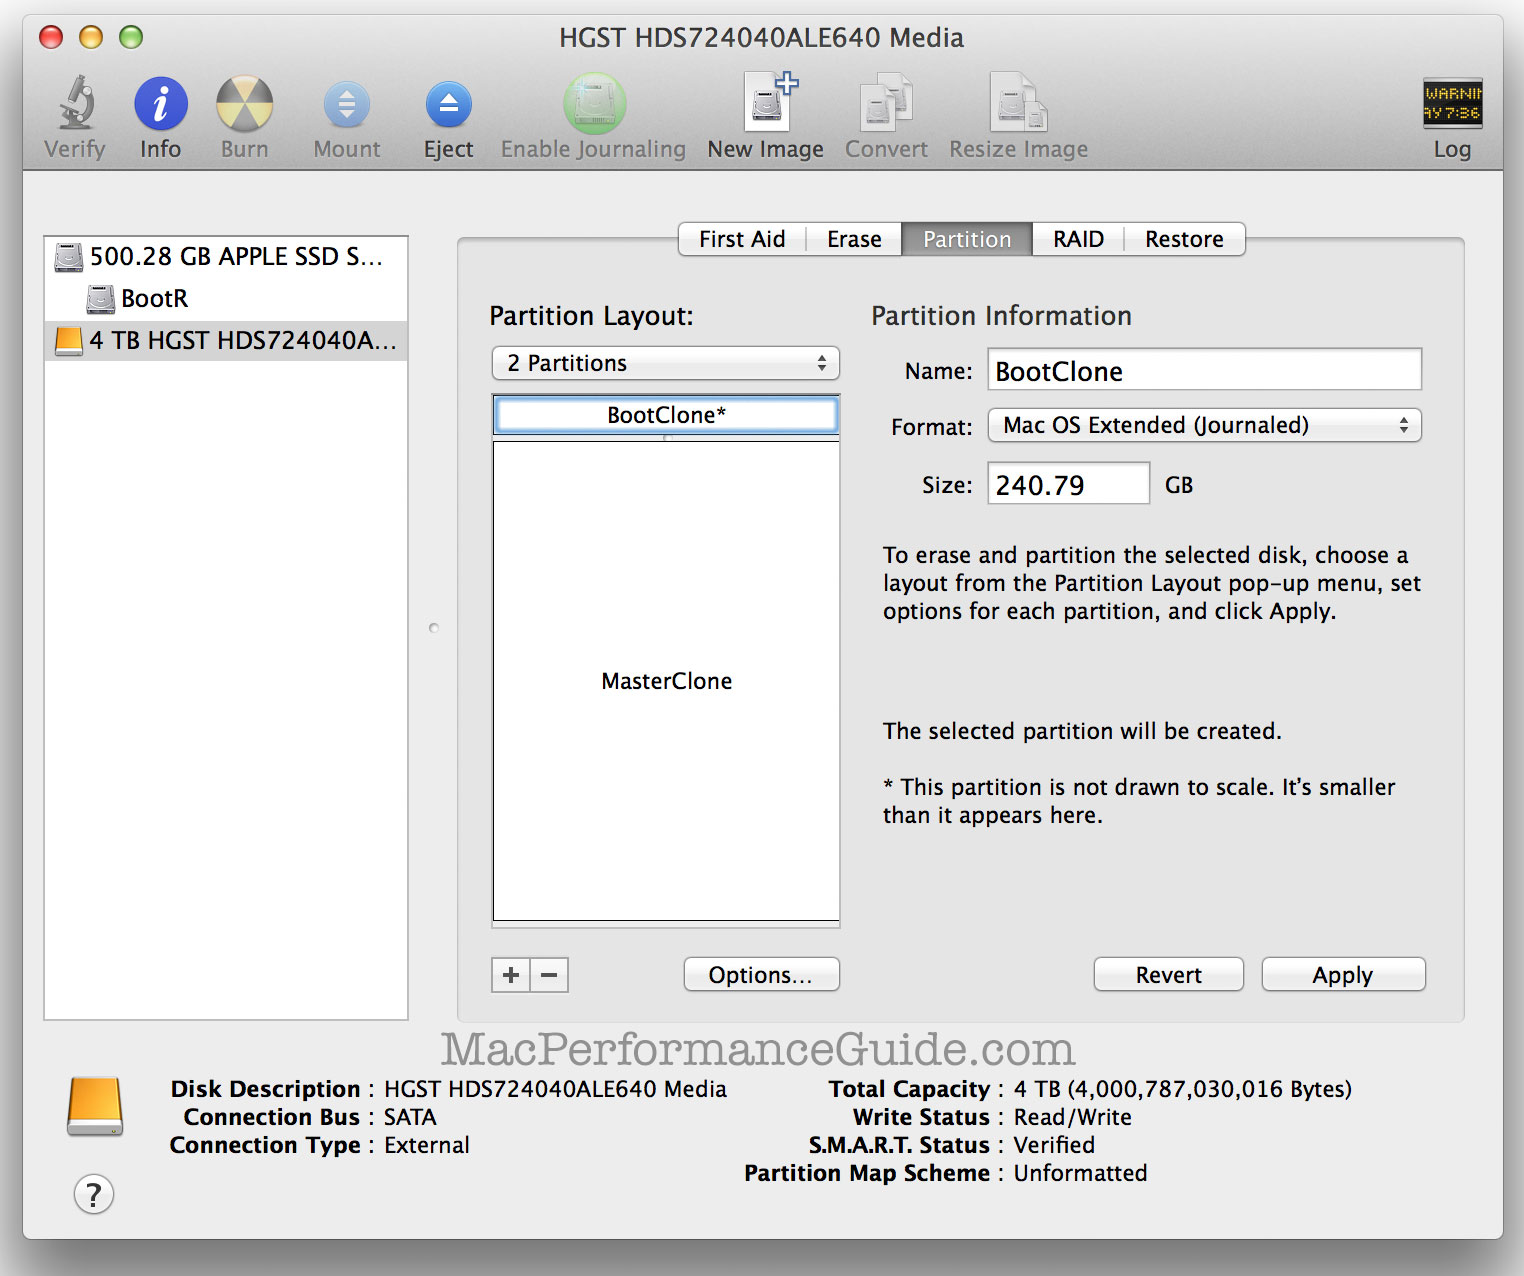
volumes BootClone and volume MasterClone
Partitioning allow a single drive to be split into distinct areas*, which are called volumes. Typically there is one user-accessible volume per drive.
Each volume appears on the desktop with its own icon, has its own volume name and its own independent file system. Thus if there is file system damage on one volume, the other is unaffected.
Apple ships its Macs with a single user-visible partition/volume called “Macintosh HD”. Even But even is slopping in the use terminology, calling this a “drive” in many places. This leads to confusion when partitioning is done. The proper term is a volume.
* Various types of multi-drive setups (RAID) can also be partitioned.
** There is actually a hidden recovery partition/volume in OS X also.
Why partition?
There are several reasons to partition one drive into multiple volumes:
- To guarantee that the fastest part of the drive is used; see Why you need more space than you need.
- To separate a system volume from a data volume, e.g., Boot and Master volumes (it is more robust to to use two drives, but this is not always available).
- To boot more than one operating system (e.g. OS X and Windows).
- For cloning multiple volumes to their respective clone volumes on a single drive. See Cloning as a Backup Strategy.
- To allow striping of one portion and mirroring of another portion (with other drives).
When not to partition
Partitioning an SSD divides the capacity in a way that tends to be wasteful as needs change (this is true of hard drives too, but they are generally 4X to 8X the capacity, so it’s a moot point as a practical matter).
Moreover, there is no performance benefit to partitioning an SSD, unlike a hard drive. With SSDs commanding a premium price per GB of capacity, partitioning is generally unattractive for the capacity utilization potential.
Laptops typically have a single internal SSD, as do certain desktops. Unless there is a compelling use case, leave it that way (do not partition).
Your author’s desktop system partitions a high-capacity SSD RAID for the Boot + Master approach. But on your author’s laptop, no partitioning is done. Partition for good and well-defined reasons.
Example with two partitions
One optimal system setup is to have a Boot volume (system and applications) along with a Master volume (most user data).
There are reasons to have additional volumes, e.g., a Catalogs volume on a very fast SSD for Lightroom catalogs), but we’ll stick to the Boot + Master example here.
As shown below, an uninitialized hard drive has been added to the system. The tab has been clicked, and has been chosen.
The goal here to create two volumes for clone backup purposes: BootClone and MasterClone. BootClone is intended as a clone of volume Boot, and MasterClone is to be a clone of volume Master.
The size has been set for each partition by typing it in (240GB = 0.240 TB), and each partition has been named (BootClone and MasterClone).
Mouse over the start/confirm/status buttons to see the steps.
When done, the volume icons will appear on the Desktop with the chosen names (assuming the preference is selected in the Finder).
If these are backup volume as here*, it is generally a good idea to exclude backup volumes from Spotlight search. Unless one enjoys backups taking twice as long.
Example with ten partitions
Hardly anyone needs anywhere near ten partitions but a software developer looking to boot 10 different OS X versions might well want to do this.
Mouse over the start/confirm/status buttons to see the process.
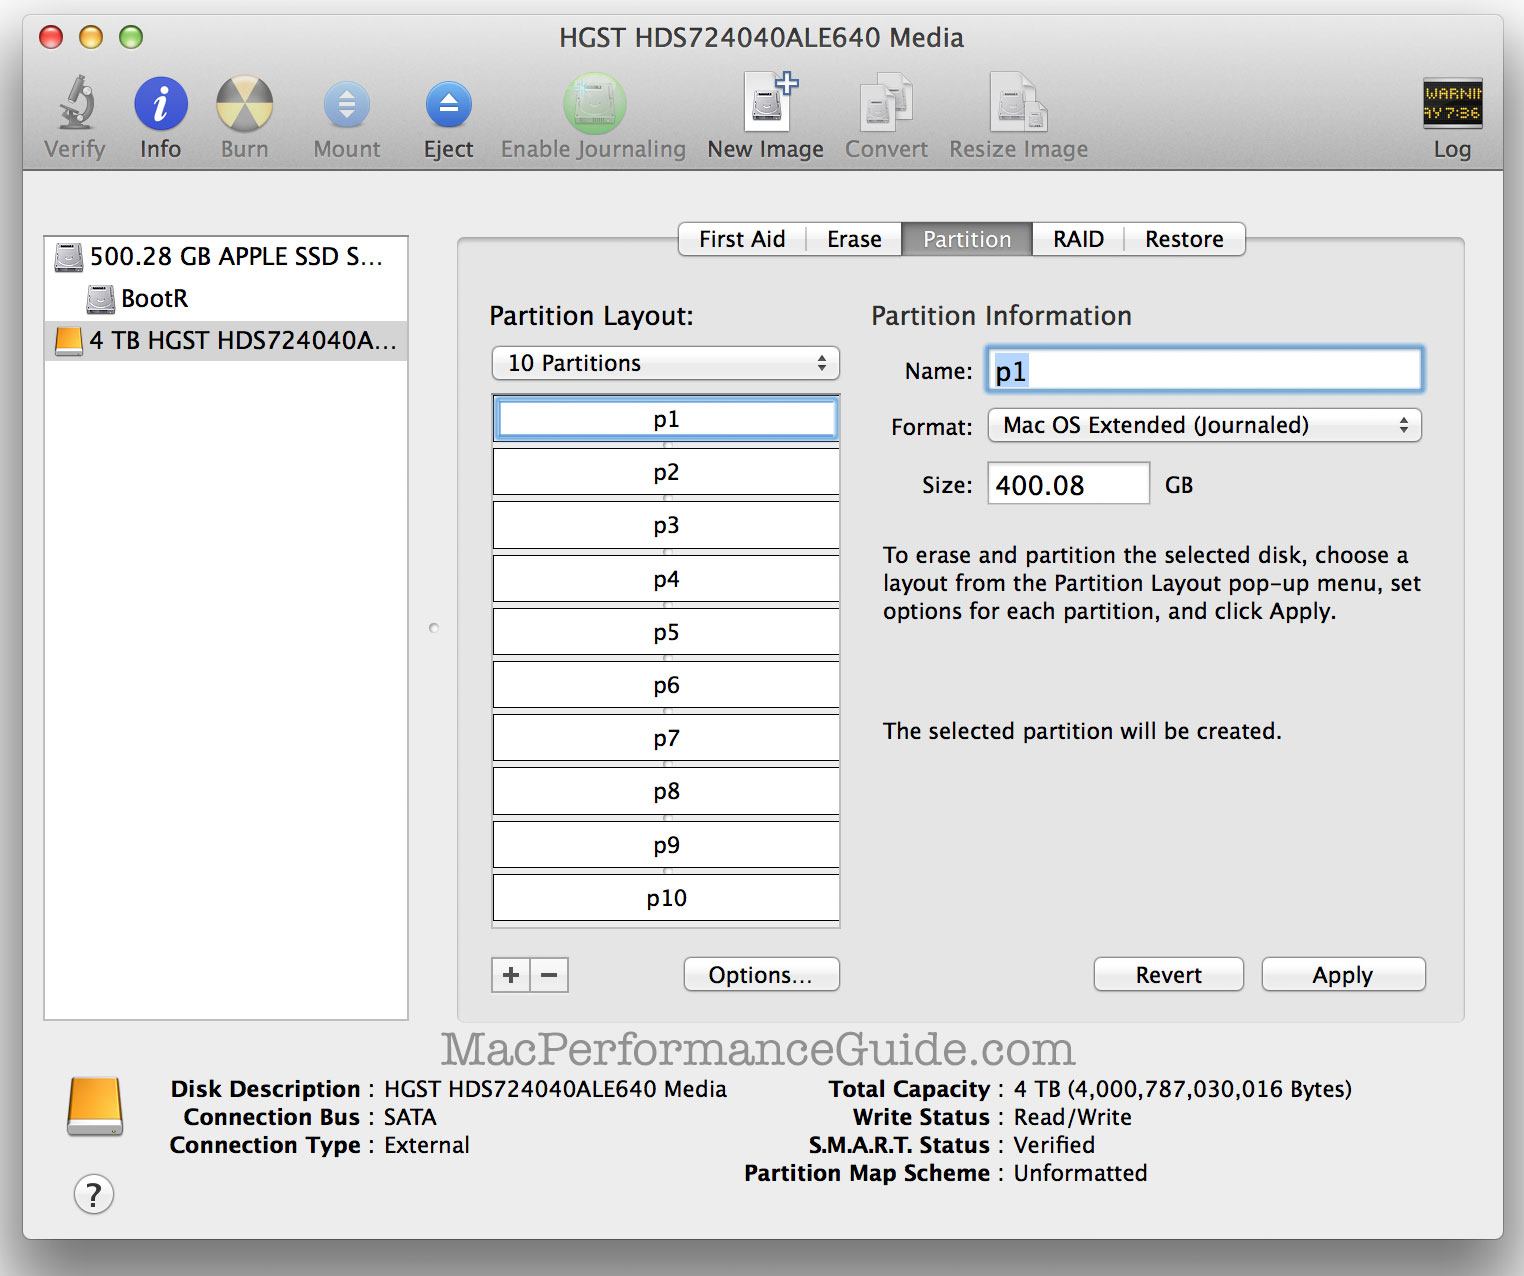
On the desktop appear 10 volume icons after partitioning as above:
Seagate 22TB IronWolf Pro 7200 rpm SATA III 3.5" Internal NAS HDD (CMR)
SAVE $100
