|

|

|

|

|
$220 SAVE $130 = 37.0% Western Digital 16.0TB Western Digital Ultrastar DC HC550 3.5-in… in Storage: Hard Drives
|
$500 SAVE $75 = 13.0% OWC 1.0TB OWC Atlas Pro SDXC V60 UHS-II Memory Card (2-Pack) in All Other Categories
|
|

|
|

|
My Mac Pro: An Example
Related: backup, hard drive, How-To, Mac Pro, memory, Photoshop, RAID, RAID-0, Seagate
To make this performance guide “real”, this page covers how I set up my personal Mac Pro, the original 2006 quad-core model. Since then I’ve upgraded to the 2008 eight-core Mac Pro, a “delta” is discussed below.
Its overall configuration is as follows:
- Original quad-core 3.0GHz Mac Pro;
- 16GB memory;
- Apple 30" Cinema Display and Sun 24" LCD display;
- ATI Radeon X1900 graphics card;
- Sonnet Tempo 4-port SATA card (for external SATA);
- Two (2) SeriTek 2SE2-E SATA cards (for external SATA);
- Six (6) X 1TB internal Seagate hard drives;
- Several external 2 and 4-drive FirmTek SeriTek SATA enclosures (for backup);
- The computer runs on an uninterruptible power supply (UPS).
See the Recommended Hardware and Optimizing Photoshop — Conclusions page for hardware I recommend.
Switching to the 2008 eight-core Mac Pro
Late 2008 was not good timing to switch to a newer Mac pro because early 2009 almost certainly will bring a new Mac Pro model. However, software development and research needs required 8 cores instead of 4, and so I purchased a refurbished eight core 2.8GHz Mac Pro, selling the 2006 quad-core Mac Pro described on the rest of the page.
I configured the new machine essentially the same way as described here, except that I went to 32GB memory. Initially I did not install the special bracket for an extra two (total of six) internal hard drives, but that might still be on the menu.
Here is the procedure I followed to transfer to the new Mac Pro.
- On the old Mac Pro, I backed everything up—twice, to two sets of external hard drives;
- I installed the 32GB of memory in the new Mac Pro, and I removed its single hard drive.
- On the old Mac Pro, I inserted 4 new Western Digital RE3 hard drives into a FirmTek 4-bay SeriTek/2eEN4 eSATA enclosure, and partitioned them the same way as in the old Mac Pro. I then copied the contents of my drive to the new drive, thus creating a new drive.
- I removed the 4 RE3’s from the enclosure containing , and installed them into the four internal drive bays of the new Mac Pro.
- I switched the old Mac Pro boot drive to the new Mac Pro and rebooted!
That’s it.
Switching to the 2009 Mac Pro Nehalem
In April 2009 I switched to the Mac Pro Nehalem (see review).
Setup was nearly identical as above, except that the Mac Pro Nehalem boots using an Intel X25-M solid state drive. See How to Make Your Mac Feel Lightning-fast.
Display accuracy (color)
I love the 30" display. Once used, one can never go back to a smaller display!
Users with a critical need for color accuracy might not find the Apple 30" Cinema Display adequate (though at least one well-known color expert uses it!). Future versions of the display might or might not provide accurate enough color or gamut for critical work. I find I am able to get excellent fine-art grade print accuracy using my 30" Cinema Display, but there certainly are some outlying images which can be more challenging.
Update: I’ve switched to the NEC 30" LCD 3090WQXi, which is vastly better than the Apple 30" for color gamut and grayscale uniformity.
Hard drive setup
Shown below are screen dumps from SoftRAID on how I’ve used RAID in my system. The Mac Pro contains six (6) internal SEAGATE 1TB Barracuda ES.2 ST31000340NS hard drives using the internal SATA ports. The “NS” version is the enterprise-grade drive, the “AS” version is much less expensive and might perform just as well (not tested). My current top pick might be different, but the Seagate ES.2 drives have served me well.
Up to 64TB @ 12500 MB/sec!
Mac or PC.
Ideal for Lightroom, Photoshop, 8K video, data analysis, etc.
Boot Volume
The boot volume does not need high performance Why: reboots are infrequent, and applications, once launched, are cached by the system in unused memory. Always install adequate memory, and the boot drive speed becomes a non-issue.
My boot volume is a 500GB SATA drive in an external Firewire 800 case. Just about any reasonably fast drive will do, and this frees up an internal drive bay for data storage. If you don’t need all the internal drive bays, by all means use an internal boot drive, but separate your data from the system and applications— at the minimum install a second hard drive for your data (with a Mac Pro).
Here the external drive has been partitioned into Boot and Spare. The main reason for this is performance optimization: the 64GB boot partition will have fast seek times and fast transfer time from the fast area of the disk. The Spare portion goes unused, as it is too small for my data, but it could be your Data volume in a really basic system (hard drive failure toasts both system and data, not as good as two hard drives).
Choose a reasonably large boot partition, 64GB is plenty for most users, but 128GB will all but eliminate the chance of running out of space. Remember, the boot partition/volume will be for system and applications only. If you want the ultimate in reliability, you can create a mirrored boot drive using two or more drives.

Master data volume
The Master data volume contains all my data, over 1 terabyte of data. High performance is useful and pleasant for working with images, but is also critical to doing fast backups. So Master is a 4-drive stripe for performance, approximately 1.4TB partitioned off the four 1TB Seagate drives. This setup yields a sustained transfer rate of approximately 400MB/sec. The remainder of the space is captured in the volume Backup-Int4x, space I tend to ignore.
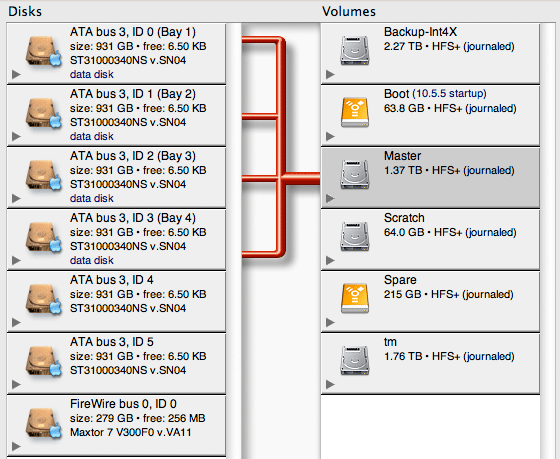
(4 Seagate 1TB hard drives)
Backup data volume
This is the extra space not used on the four drives used by the Master data volume, totaling 2.27TB. It’s not a real backup, since failure of one drive on Master also fails the backup. But sometimes its useful to have a full online duplicate. Or one can simply not use the space. It is not wasted, performance is the goal being met here: utilizing the fast area of the drives.
If the data grows too large, I’ll make multiple full backups to external drives. I’ll then repartition, making Master larger, perhaps 1.8TB or 2TB. Then the data gets copied back to Master, and things return to normal.

High performance scratch volume
From a pair of the 1TB Seagates, a 64GB scratch partition is partitioned off. This offers very fast performance. While a 3 or 4 drive scratch volume would be even faster, it’s not dramatically so for my needs. However, it can make a substantial difference for Photoshop when large files are involved.
By keeping the scratch partition on drives that are distinct from Master, there can be no disk head contention (seeking), so used as a Photoshop scratch disk, activity on Master happens simultaneously with activity on Scratch. However, contention generally does not occur using Photoshop by itself, so using separate drives for Scratch and Master is not required.
The remainder of the two Seagates is used to make the 1.76TB “tm” volume for Time Machine backups (below). Other backups are of course made, onto external SATA drives.
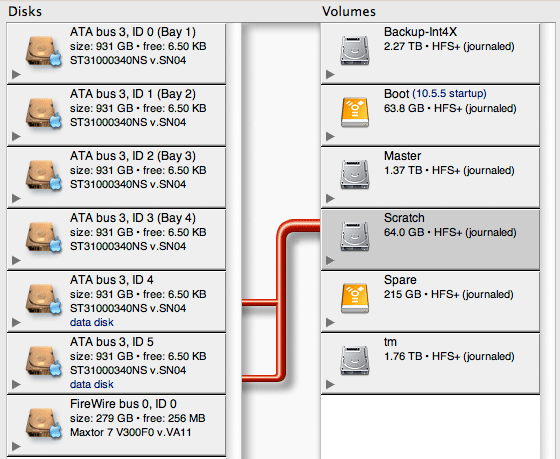
Backup volume “tm”
A striped backup volume for Time Machine (or any other backup). Striping a backup volume is not ideal, since it increases the possibility of failure, but when total data exceeds 1TB and the drives themselves are less than 1TB formatted, there is no choice. Multiple external backups are also made, so this is no big deal and it yields a continuous backup via Time Machine.
The two hard drives that comprise the “tm” volume are separate from the 4 hard drives that comprise Master. Failure of Master does not affect tm and failure of tm does not affect Master.

Space is cheap
Create a system that works for you: high performance, high reliability and don’t forget to backup.
Fast 1TB hard drives are now relatively cheap (as little as $80), and even if you don’t need the space, the performance they yield especially as as RAID stripe is worthwhile. See Why you need more space than you need.

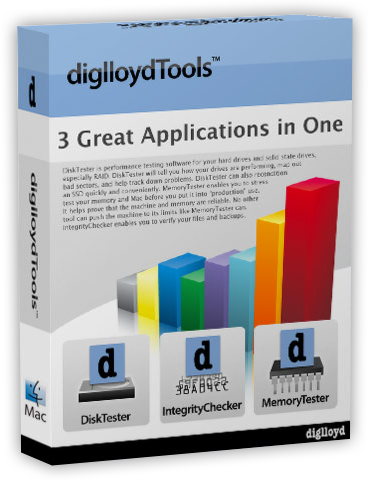 diglloydTools™
